Book Cover Pins: A How To
For RWA and RomCon I made small bookcover pins for friends and people I was on panels with. Lots of people asked me how I did it, and I promised to share directions. I figured sooner was better than later, so here we go! 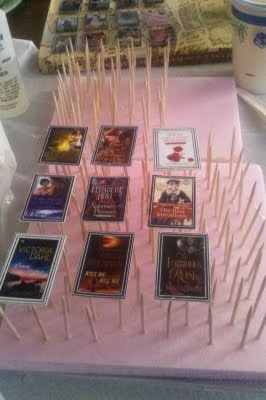
Print your cover onto heavy stock matte paper. I like to make the covers 1.5” tall and surrounded them with a border.
Cut them out.
Lay out on a sheet of hard, slick plastic (I like to use page protectors).
With a small paint bush, put one coat of Elmer’s White glue on the back and two on the front, allowing each coat to dry separately. This seals the paper. Once dry, trim off any excess glue. Don’t worry about it being too thick, the glue will dry clear.
Press them flat for a few hours or overnight, as the glue sometimes makes them curl a bit.
For the next step, the future pins need to be suspended in such a way that the liquid 2-part epoxy resin can be poured over them and drip off without the pin becoming one with the surface it’s resting on. I made a support out of a small sheet of Styrofoam and toothpicks (see pic).
Balance the covers on the support you’ve built so that they don’t touch.
Mix up the epoxy resin according to the directions on the package (you can get this at any good craft store). Drizzle it carefully over the images (I just use the wooden coffee stir stick I mixed the epoxy resin with), making sure to coat all of the surface. Do not worry about air bubbles, they will work their way out as it dries.
Let them dry for at LEAST 3 days. A week is better.
Edges can be sanded with an emery board if necessary.
Superglue a pin back to them and you’re done.
NOTE: You can make your pins and shape or size, and you can decorate the paper with glitter, jewels, etc. before coating in epoxy resin. Have fun with it!


Comments
Post a Comment